

How to install Kali Linux on Windows 10
Kali Linux is a Debian derived based linux distribution type OS designed for digital forensics and penetration testing. Since Kali Linux is a most secure form of operating system which most of the forensics experts and security analysists uses for ethical hacking and pen-testing.
Also, Kali Linux is based on GUI which means users can interact through Linux based applications as compared to the CUI based Linux.
So, in this tutorial, I will show you how to install Kali Linux on windows 10 in simple English. So installing kali Linux are of many methods but since we are installing in windows 10 so, I will show you in two methods –
Installing Kali Linux using Vmware
Installing Kali Linux using windows subsystem
1. Installing Kali Linux Using Vmware
This is the first method in which we will run Kali Linux in a virtual environment. Vmware is an emulation for the computer system or a software in which it creates a virtual environment such that it behaves like an running in real hardware machine. And so you can create just like any environment to run any OS you want on your windows.
So, by this way, we will create a virtual environment in which we will run our fully loaded kali Linux in VMware.
Step 1 – First of all you need a virtual machine software, you can use any software you want but I recommend to use VMware, you can download this from here. Now just you need to install it.
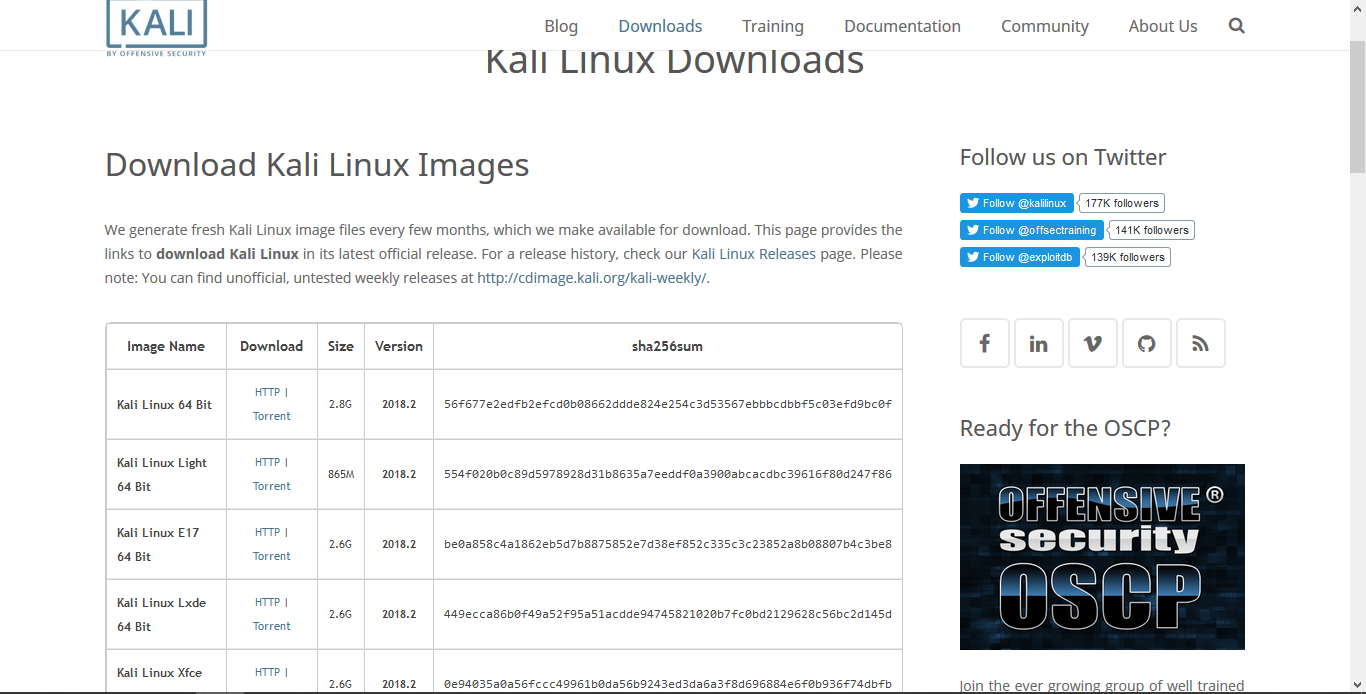
Step 2 – After you have the installed the VMware, now you need a kali Linux OS iso file to run on your virtual machine. Just go to this page and choose your respective version to install
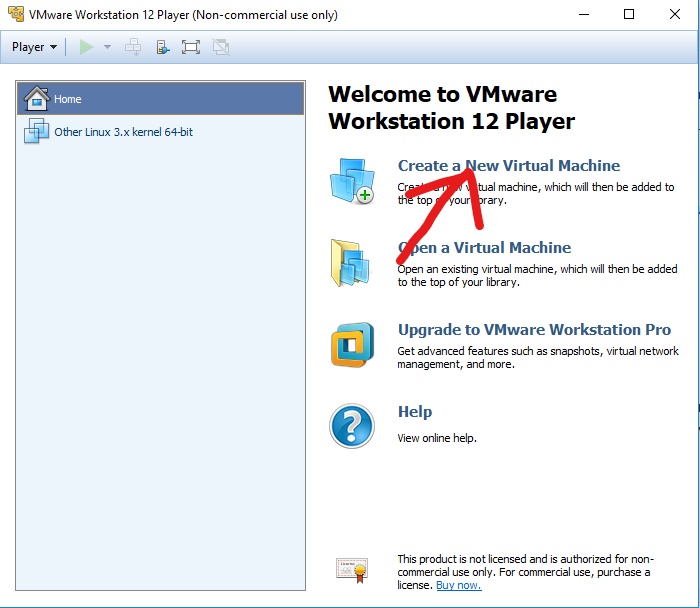
Step 3 – Now you have both the things, just launch the VMware and click on “create new virtual machine“. After a new wizard open just select on “Installer disc image file” and click to browse to select your downloaded iso file of kali Linux and click on next.
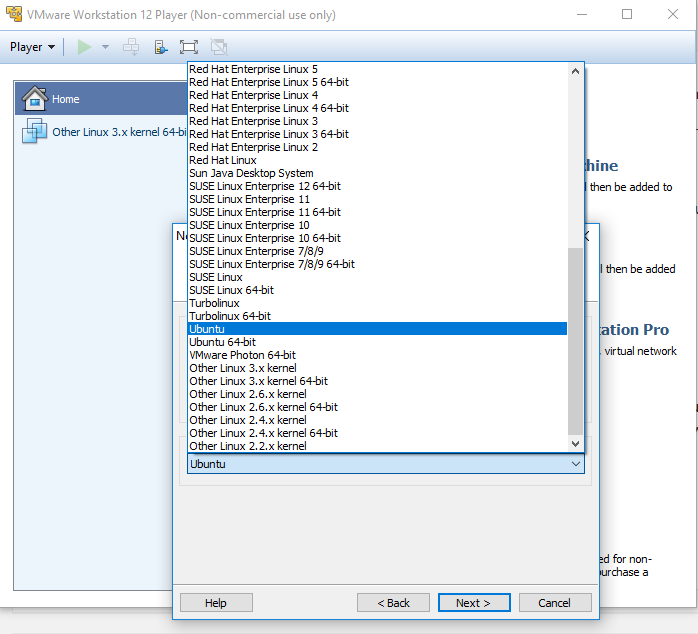
Step 4 – Now a new wizard open if which you have to select kali and choose version to Ubuntu or “Other Linux 3.x kernel 64-bit” then name your virtual machine in the next wizard and click next then set your Maximum Disk space, I preferred to set the value to its default which is 10 Gb and select “store virtual disk as a single file“.
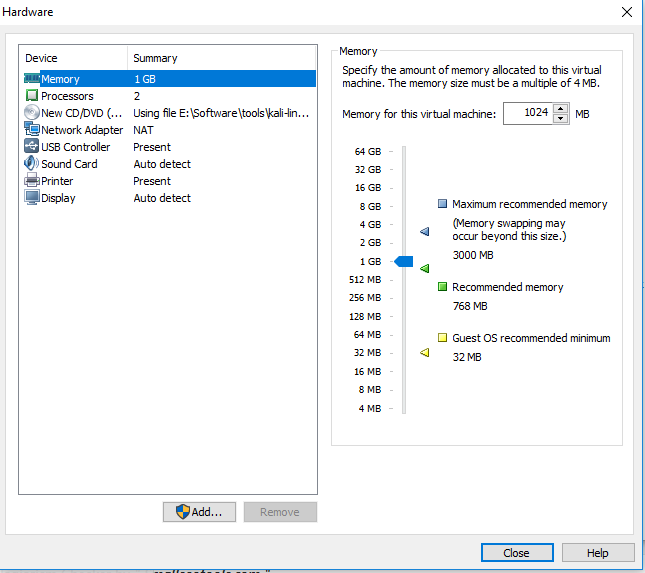
Step 5 – Now in the next wizard click on “customize hardware” and set all the settings of hardware according to the given below image, and after setting done just click on finish
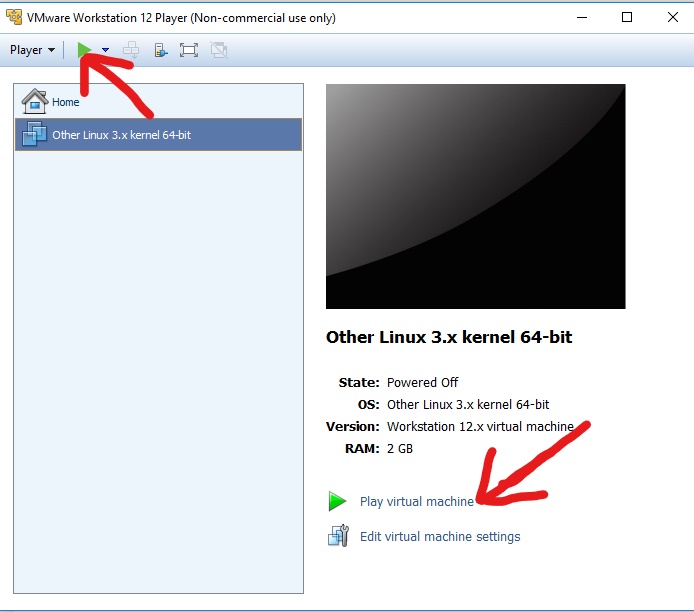
Step 6 – Now, you have successfully created your kali Linux virtual machine on your VMware. Now all you have to do just click on play button and your booting process is now started
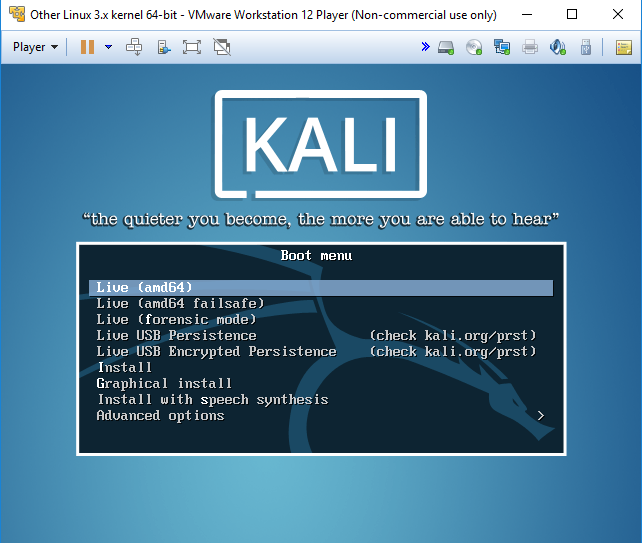
Step 7 – You have two options to run you kali Linux. If you want to run it as a life then just click on “Live USB persistence” or want to do a permanent install on VMware click on “graphical install”
So finally these are the simple steps to install in a virtual machine on windows 10. Let’s go for second installation process of kali Linux and in this method, you don’t need any virtual machine software. You can access you command line just from the command prompt.
2. Installing Kali Linux using windows subsystem
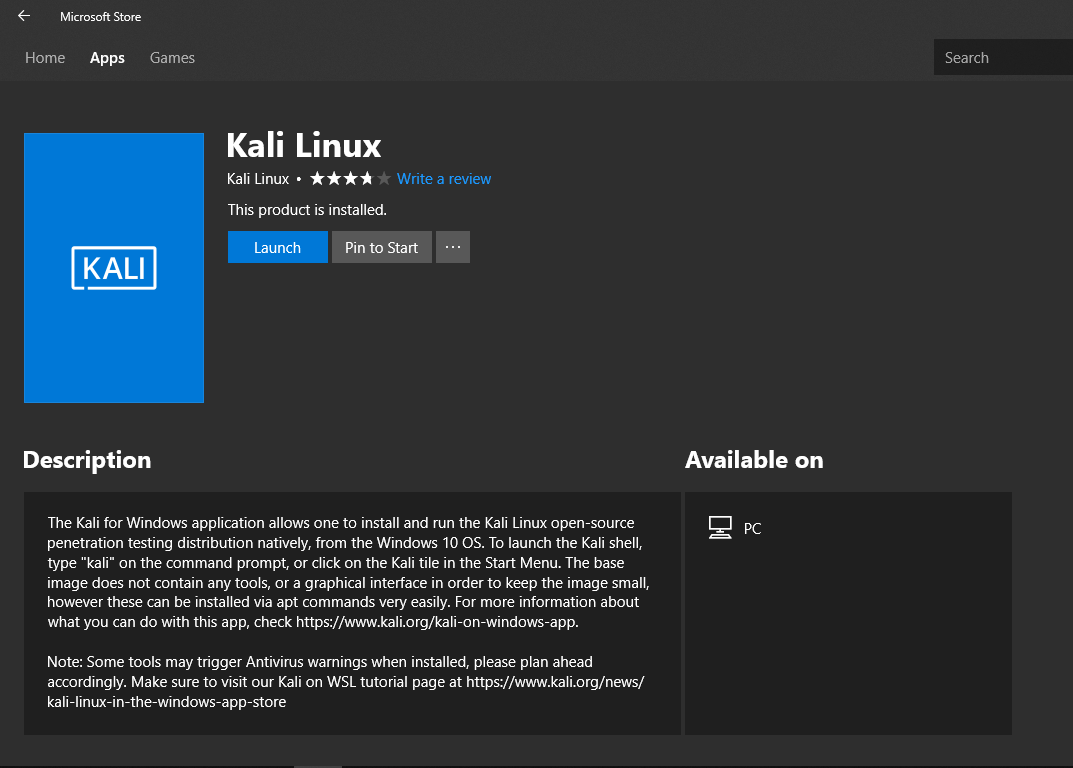
Now, In this method, you will almost completely get the experience of kali Linux using windows subsystem. Kali Linux has launched its own app on Microsoft store to run your command line on windows 10.
Step 1 – Firstly you need to download an app from Microsoft store that is Kali Linux app and install it, it is only space up to 160 MB.
Note: Before you install this app make sure to disable your antivirus programme, it is not a virus but it may be corrupted.
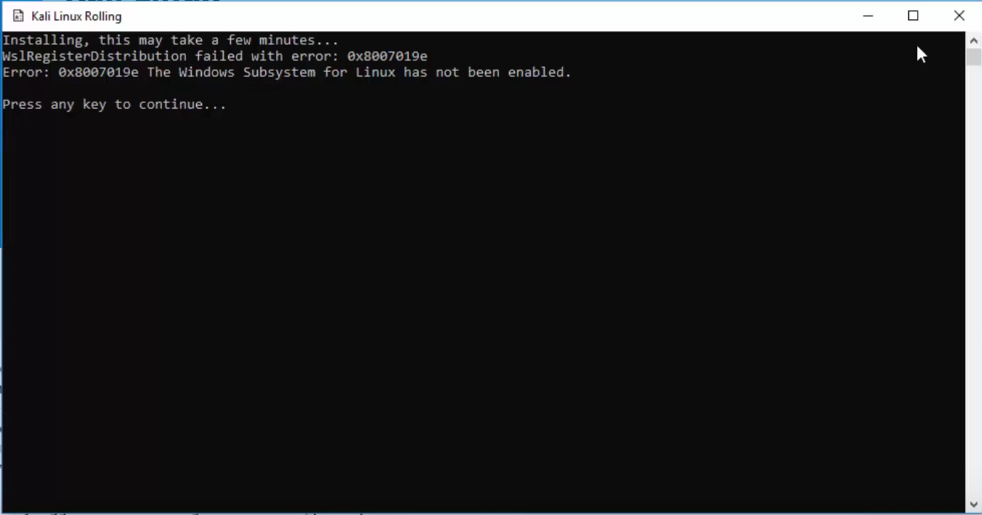
Step 2 – After you launched the app, here will open a new command prompt window which shows some error, now you need to run the power shell programme with administrator already installed in your pc.
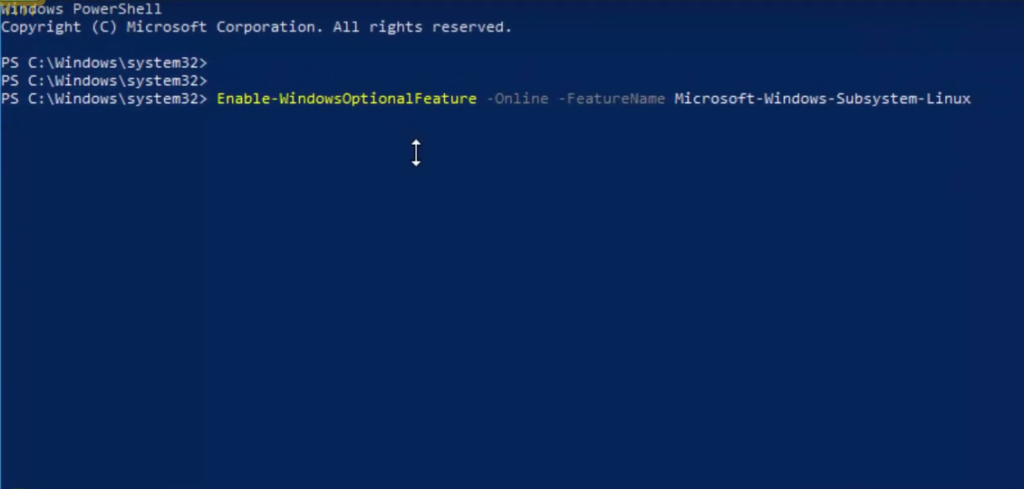
Step 3 – After you opened the power shell, just copy and paste this whole command line to the power shell – “Enable-WindowsOptionalFeature -Online -FeatureName Microsoft-Windows-Subsystem-Linux”
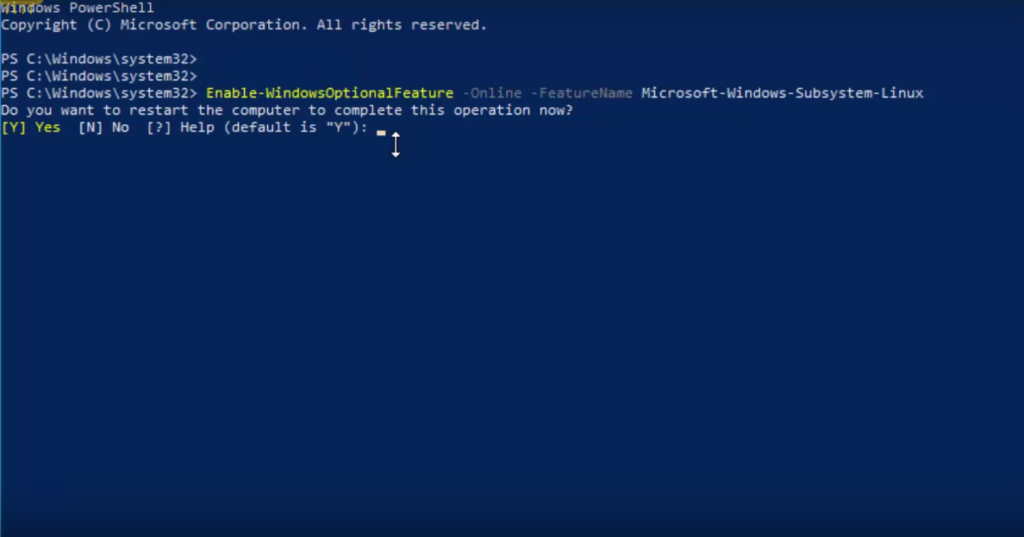
Step 3 – Now the installation process will start and after some few minutes it will ask to restart the windows, so just type “Y” and the system will restart.
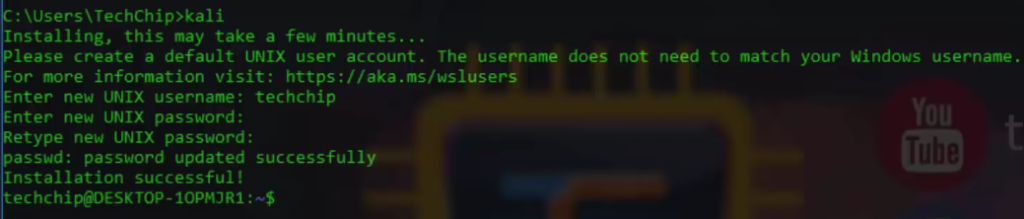
Step 4 – After getting a restart, you need to open again CMD and type “kali” and this installation process will take few minutes. Now it will ask for entering “UNIX username” and “UNIX password“, Just type any username and password you want and click enter, Now you have successfully installed.
If you want to install any program you need to type “sudo” before entering any package name for example “sudo apt install nmap” and retype the password to confirm installation
Final Words
Basically, both the methods are effective and easy to install bu through VMware you can run the Kali Linux as a virtual machine and can able to use the GUI based Linux but it uses much RAM and processing speed to efficiently run kali Linux on the VMware
But as recently launched the kali Linux app in windows store by WSL, you can run Kali Linux easily in CUI basis but some applications won’t work which is of GUI based.
Great things starting you. I have understood your matter former to and you are just too wonderful. I really like anything you have developed now, surely like anything you are saw and the way in which you about it. You style it enjoyable and you silent care for to keep it smart. http://www.minicro.in/technology/cyber-security/
Nice Post.. Its Helpfull.. Thank You.. you are Awesome.
thanks air max